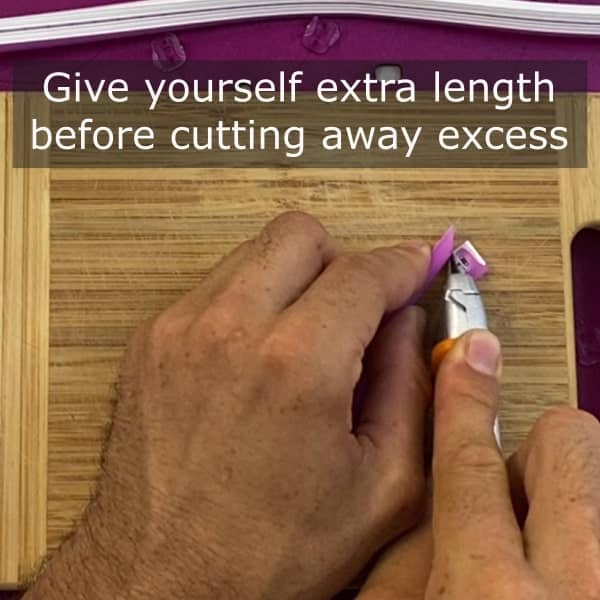
Measure and Cut the Neon Flex
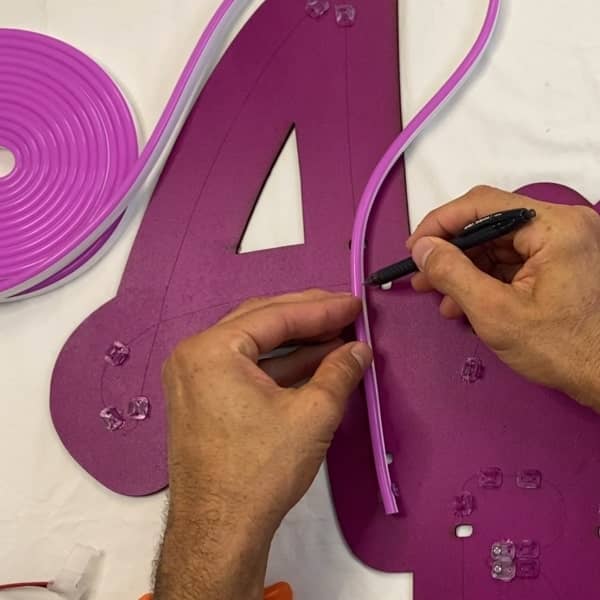
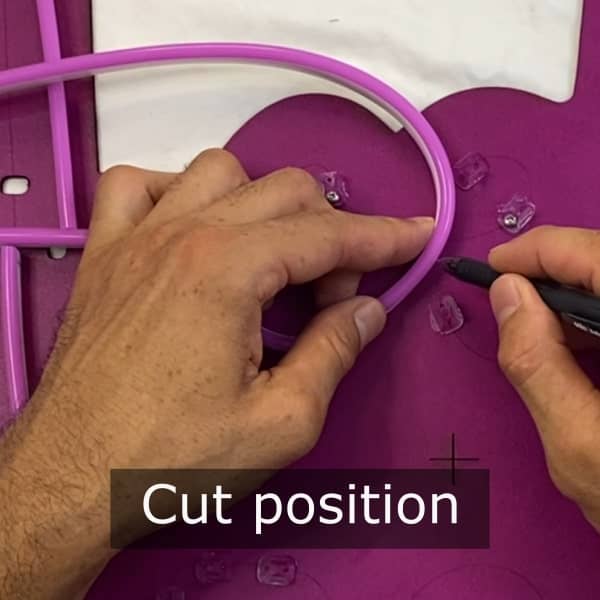
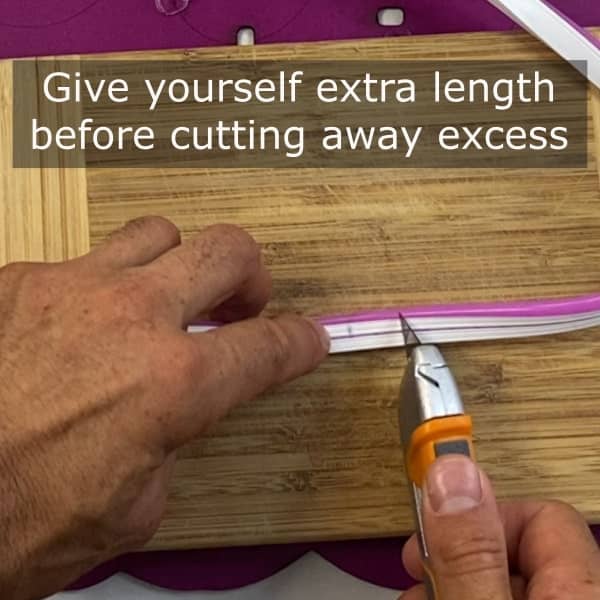
In the video I shape and position the neon flex around my design path. I recommend that you add a few extra centimetres on the first cut, then trim down when fitting and cutting the angle as required.
Key Points
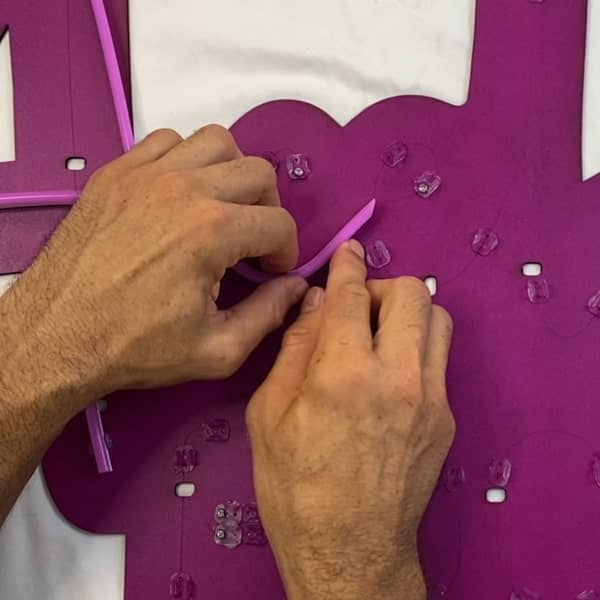
- Your design will likely consist of multiple cuts of neon flex that are reconnected to the electrical circuit.
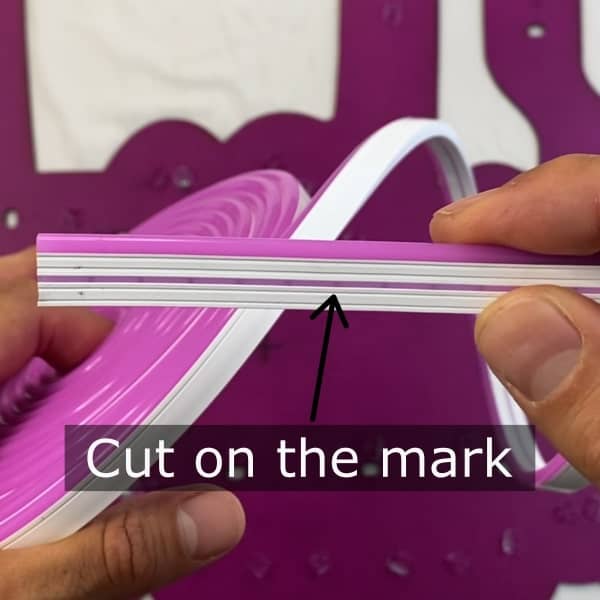
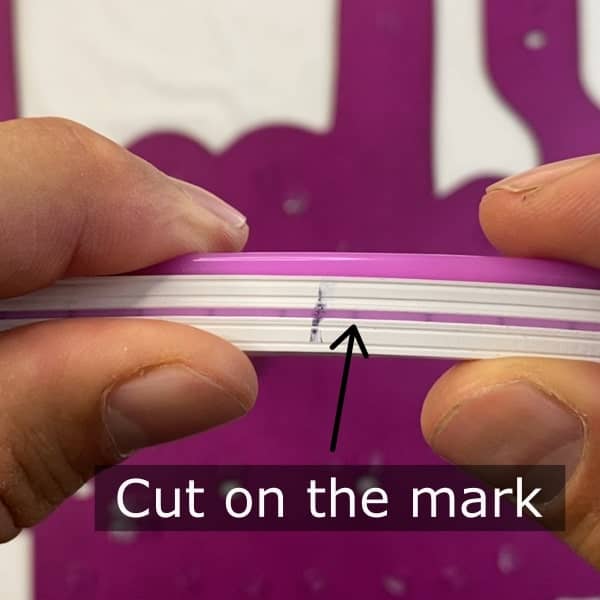
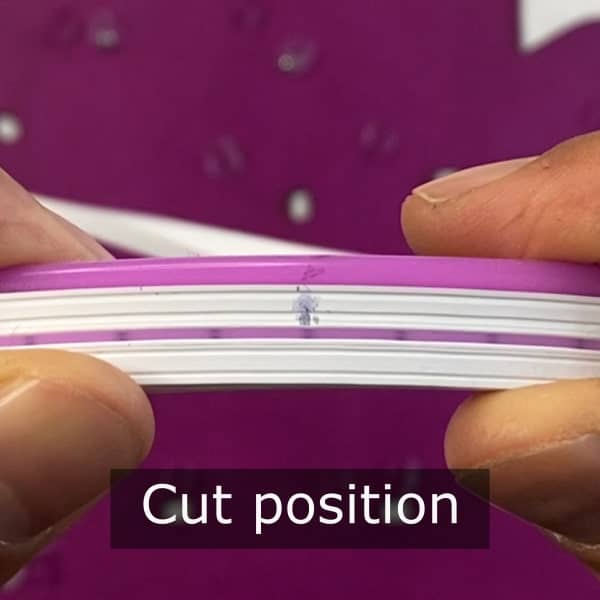
- Each LED unit is 1cm in length. A dotted line can be seen on one side of the neon flex indicating the position of each unit. When cutting the neon flex, cut directly on any of the marked dots to ensure the neighbouring LED unit remains in working order.
- Shape the neon flex into position on the backboard and in the mount clips. Then using a non-permanent pen, make a mark on the side of the neon flex to indicate where you intend to cut. Adjust the position to the nearest marked dot (junction between LED units).
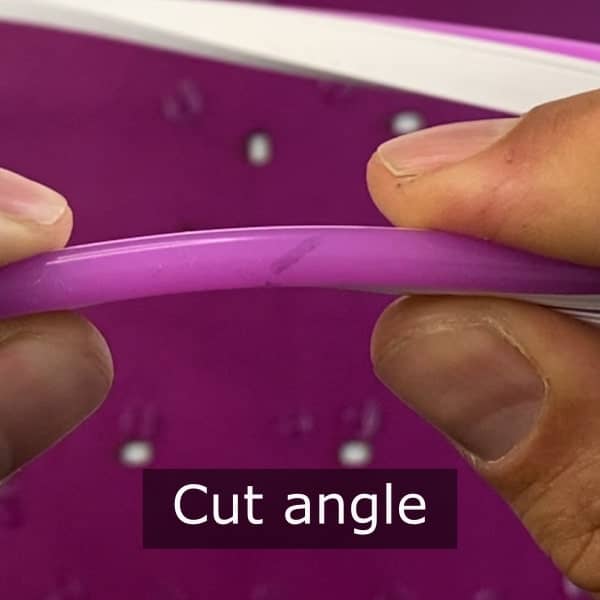
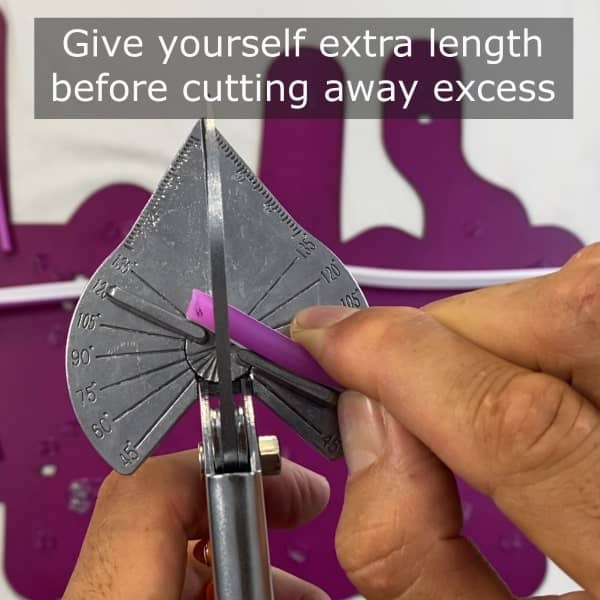
- Make a second mark on the top surface of the neon flex to indicate the “angle” of cut (optional).
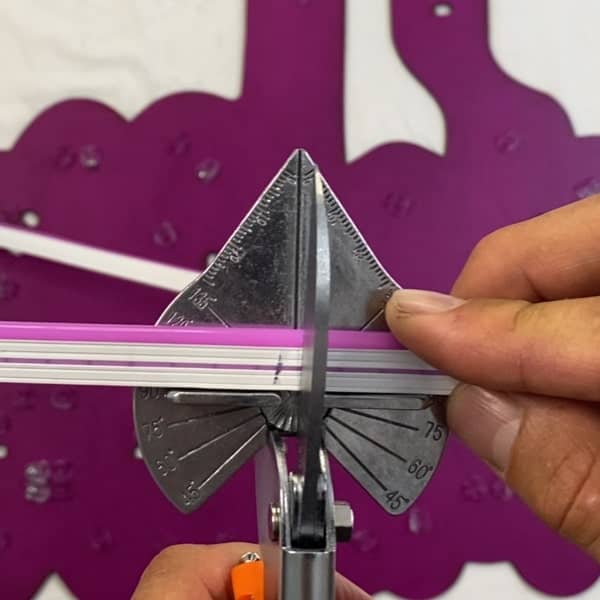
NB: You can easily cut the neon flex at angles between 30 -150 degrees. This can then be glued to other neon strips to form letters and shapes for your design. - When cutting angled neon strips, we advise that you first cut squarely through your neon flex with additional 1-2cm. Then make your final cut, removing excess and at the desired angle. Making sure the cut intersects through the marked dot, keeping the LED unit intact.